Uploading a source
BlueDolphin sources represent bits of information originating from external resources. They can be imagined as separate containers or tables of data that can be used further to create and enrich objects and relationships.
Overview of uploading a source:
Collecting and preparing data to upload.
Placing the file on the Blob Storage with the File Sharing API.
Initiating import with the Sources API.
.png)
Follow the steps in this article to upload a new source into your BlueDolphin environment using the API.
Prerequisites
To start using BlueDolphin APIs to create integrations, you need to have:
A BlueDolphin environment
Set up an API key to use in this example in your BlueDolphin environment
Step 1: Prepare the file to upload
To create a new source in BlueDolphin, you'll have to connect to your external data sources to collect all the data that you need and transform it into the required Dataset XML format.
Connect to your source and load the data.
Transform the data into the Dataset XML format.
It is important to also write the schema to the file, not only the Dataset content.
Sample file
The content of the Applicationsyyyymmdd.xml file:
<?xml version="1.0" standalone="yes"?>
<NewDataSet>
    <xs:schema id="NewDataSet" xmlns="" xmlns:xs="http://www.w3.org/2001/XMLSchema" xmlns:msdata="urn:schemas-microsoft-com:xml-msdata">
        <xs:element name="NewDataSet" msdata:IsDataSet="true" msdata:MainDataTable="ApplicationsDataTable" msdata:UseCurrentLocale="true">
            <xs:complexType>
                <xs:choice minOccurs="0" maxOccurs="unbounded">
                    <xs:element name="ApplicationsDataTable">
                        <xs:complexType>
                            <xs:sequence>
                                <xs:element name="Application_ID" type="xs:string" minOccurs="0" />
                                <xs:element name="Name" type="xs:string" minOccurs="0" />
                                <xs:element name="Version" type="xs:string" minOccurs="0" />
                                <xs:element name="Vendor" type="xs:string" minOccurs="0" />
                                <xs:element name="Category" type="xs:string" minOccurs="0" />
                             </xs:sequence>
                        </xs:complexType>
                    </xs:element>
                </xs:choice>
            </xs:complexType>
        </xs:element>
    </xs:schema>
    <ApplicationsDataTable>
        <Application_ID>5npOMiLzKK</Application_ID>
        <Name>Google Chrome</Name>
        <Version>97.0.4692</Version>
        <Vendor>Google Inc.</Vendor>
        <Category>Browsers</Category>
    </ApplicationsDataTable>
    <ApplicationsDataTable>
        <Application_ID>ugumq9vKF2</Application_ID>
        <Name>Mozilla Firefox</Name>
        <Version>96.0.1</Version>
        <Vendor>Mozilla</Vendor>
        <Category>Browsers</Category>
    </ApplicationsDataTable>
    <ApplicationsDataTable>
        <Application_ID>yXmx2D5F17</Application_ID>
        <Name>Notepad++</Name>
        <Version>8.2</Version>
        <Vendor>Notepad++ Team</Vendor>
        <Category>Code editor</Category>
    </ApplicationsDataTable>
    <ApplicationsDataTable>
        <Application_ID>rfAh8ttZ5H</Application_ID>
        <Name>VLC media player</Name>
        <Version>3.0.16</Version>
        <Vendor>VideoLAN</Vendor>
        <Category>Media player</Category>
    </ApplicationsDataTable>
    <ApplicationsDataTable>
        <Application_ID>xvqVA5OoWj</Application_ID>
        <Name>Visual Studio Code</Name>
        <Version>1.63.2</Version>
        <Vendor>Microsoft</Vendor>
        <Category>Code editor</Category>
    </ApplicationsDataTable>
</NewDataSet>
Step 2: Upload the file with the File Sharing API
BlueDolphin uses Azure Blob Storage for exchanging a large amount of information. Each tenant has a dedicated storage space, so the data for the source has to be uploaded to the blob storage.
In order to upload, you'll need to get a write shared access signature token (SAS) to the storage container. You can request this with the File sharing API. After you have the URI, you can place the file in the container.
1. Retrieve a write access string
$ curl -X GET "https://{base}/api/v1/sharedaccessstring/write" \
-H "apiKey: f08a2bb9-3ab4-451a-9099-2ef531375147" \
-H "tenant: contoso"
Replace:
{base} with "services.eu.bluedolphin.app" or "services.us.bluedolphin.app", for EU and US tenants respectively.
The returned data is a SAS URI and the URI follows this structure: https://{blob_base}/{container}?{credentials}.
This is pointing to the tenant's storage container and allows you to upload any file. The link expires within four hours.
{
    "error_code": 0,
    "error_message": null,
    "error_message_explain": null,
    "data": "https://bddatastorageprd.blob.core.windows.net/97e78613-795e-4fc3-9cb1-d8ce344ea6ab?sv=2018-03-28&sr=c&sig=HsfuH%2B8Iqz2iN1tklQW7H5TVwEQuFr9mpZL9nn60d4M%3D&se=2022-01-17T13%3A30%3A05Z&sp=w"
}
2. Modify the URI/add the name of the file after the container section
https://{blob_base}/{container}/{filename}?{credentials}The resulting URI:
https://bddatastorageprd.blob.core.windows.net/97e78613-795e-4fc3-9cb1-d8ce344ea6ab/Applicationsyyyymmdd.xml?sv=2018-03-28&sr=c&sig=HsfuH%2B8Iqz2iN1tklQW7H5TVwEQuFr9mpZL9nn60d4M%3D&se=2022-01-17T13%3A30%3A05Z&sp=w
To prevent any issues, it is recommended that you use a unique file name for a new blob file, which might be replaced during processing.
3. Upload the file using the new URI
$ curl -X PUT "https://bddatastorageprd.blob.core.windows.net/97e78613-795e-4fc3-9cb1-d8ce344ea6ab/Applicationsyyyymmdd.xml?sv=2018-03-28&sr=c&sig=HsfuH%2B8Iqz2iN1tklQW7H5TVwEQuFr9mpZL9nn60d4M%3D&se=2022-01-17T13%3A30%3A05Z&sp=w" \
-H "x-ms-blob-type: BlockBlob" \
-H "Content-Type: application/xml; charset=UTF-8" \
--data-binary "@Applicationsyyyymmdd.xml"
When uploading the BlockBlob, you should specify the charset in your request (ISO-8859-1 by default).
This request is using the Azure Storage API, more on Put Blob operation.
Step 3: Initiate the import
After the file is placed on the storage, you can send a request to the BlueDolphin Sources API to initiate processing.
1. Prepare the parameters
{
    "blobFileName": "<file-name>",
    "collectionName": "<collection-name>",
    "indexedFields": "<indexed-fields>"
}
Replace:
<file-name>with the name that was used at the file upload, for example "Applicationsyyyymmdd.xml".<collection-name>with the name that identifies this external source in BlueDolphin, for example "Source_Applications".<indexed-fields>with the name of the column that represents the unique identifier/primary key. In case of compound keys, it can be a comma-separated list of columns. Please make sure the data under ‘indexedFields’ is unique, as the API doesn't perform this validation check.
2. Send a request to start the import
$ curl -X POST "https://{base}/api/v1/datasources" \
-H "apiKey: f08a2bb9-3ab4-451a-9099-2ef531375147" \
-H "tenant: contoso"
-H "Content-Type: application/json"
--data-raw '{
   "blobFileName": "sourceFile.xml",
   "collectionName": "Source_Applications",
   "indexedFields": "Application_ID"
}'
Replace:
{base} with "services.eu.bluedolphin.app" or "services.us.bluedolphin.app", for EU and US tenants respectively.
You should receive a response similar to the following, indicating that the request was received and the import is running in the background:
{
    "error_code": 0,
    "error_message": null,
    "error_message_explain": null,
    "data": true
}
After the import is processed, the file will be removed from the Blob Storage.
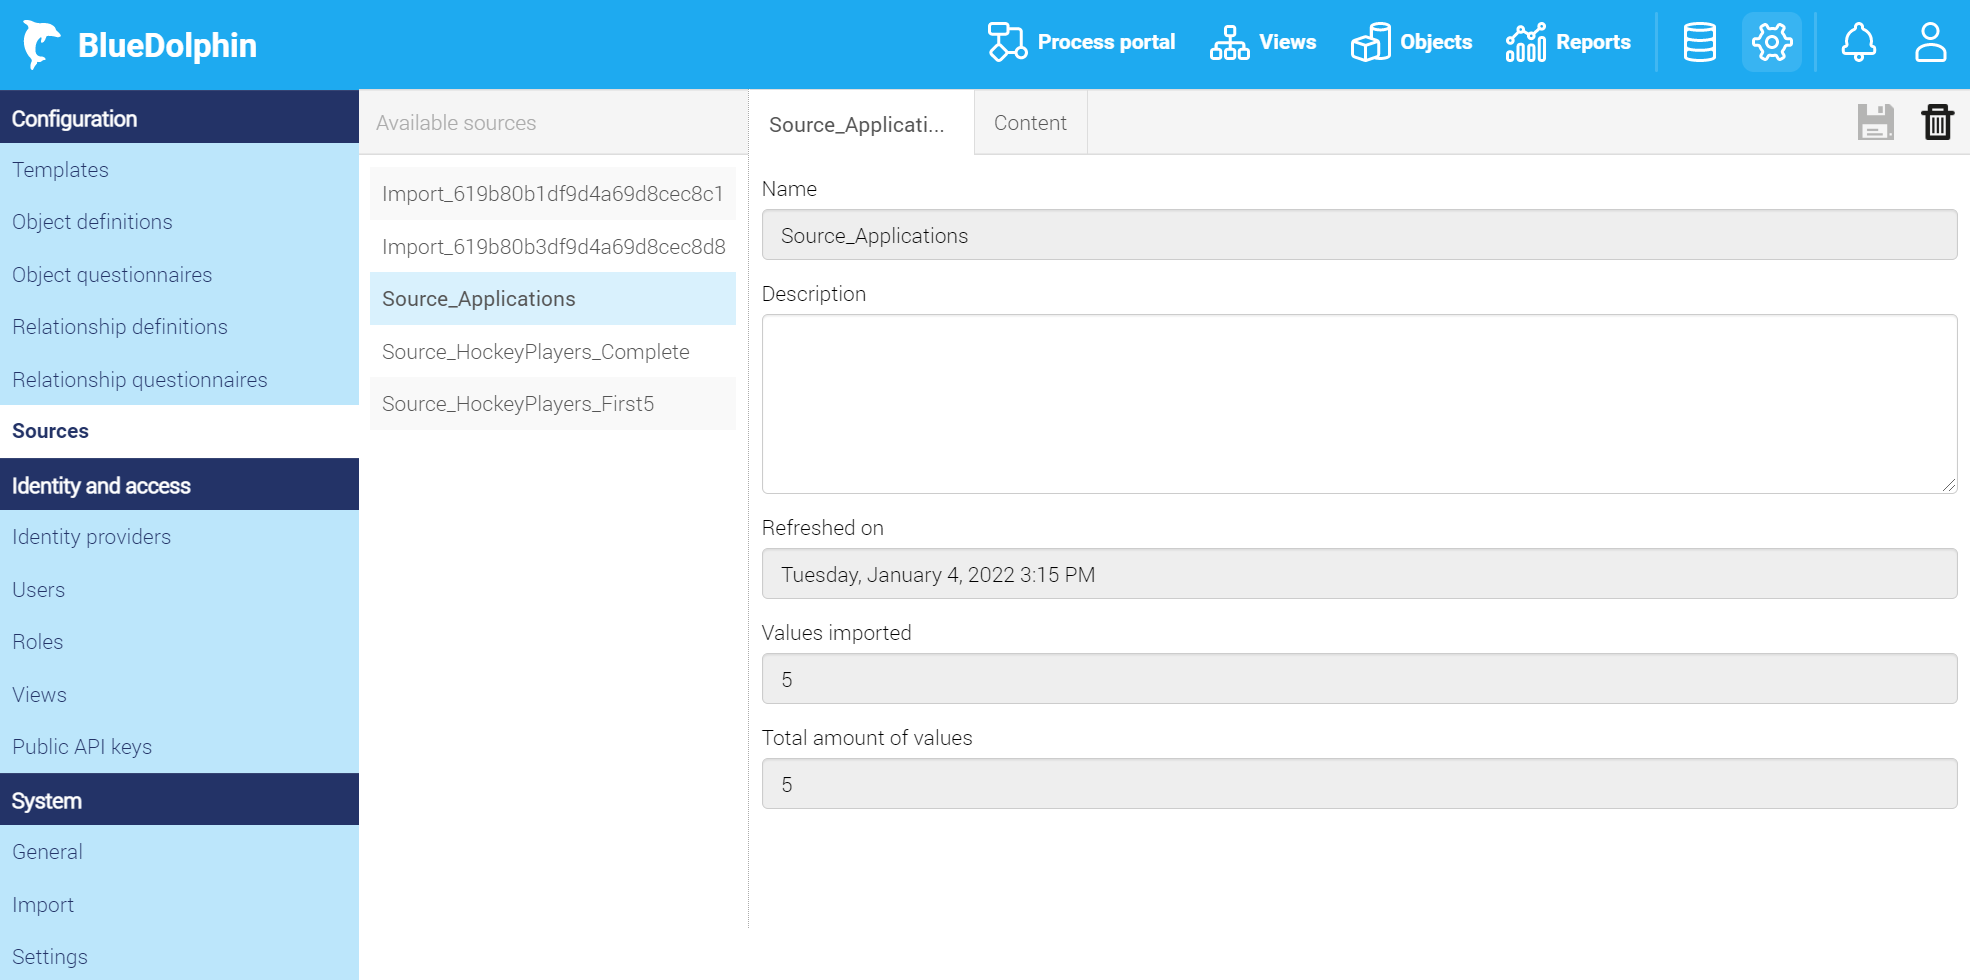
Check the result
The newly uploaded source should appear in BlueDolphin Admin > Sources.
Alternatively, it is also available in the list of all sources that can be retrieved with the Sources API.